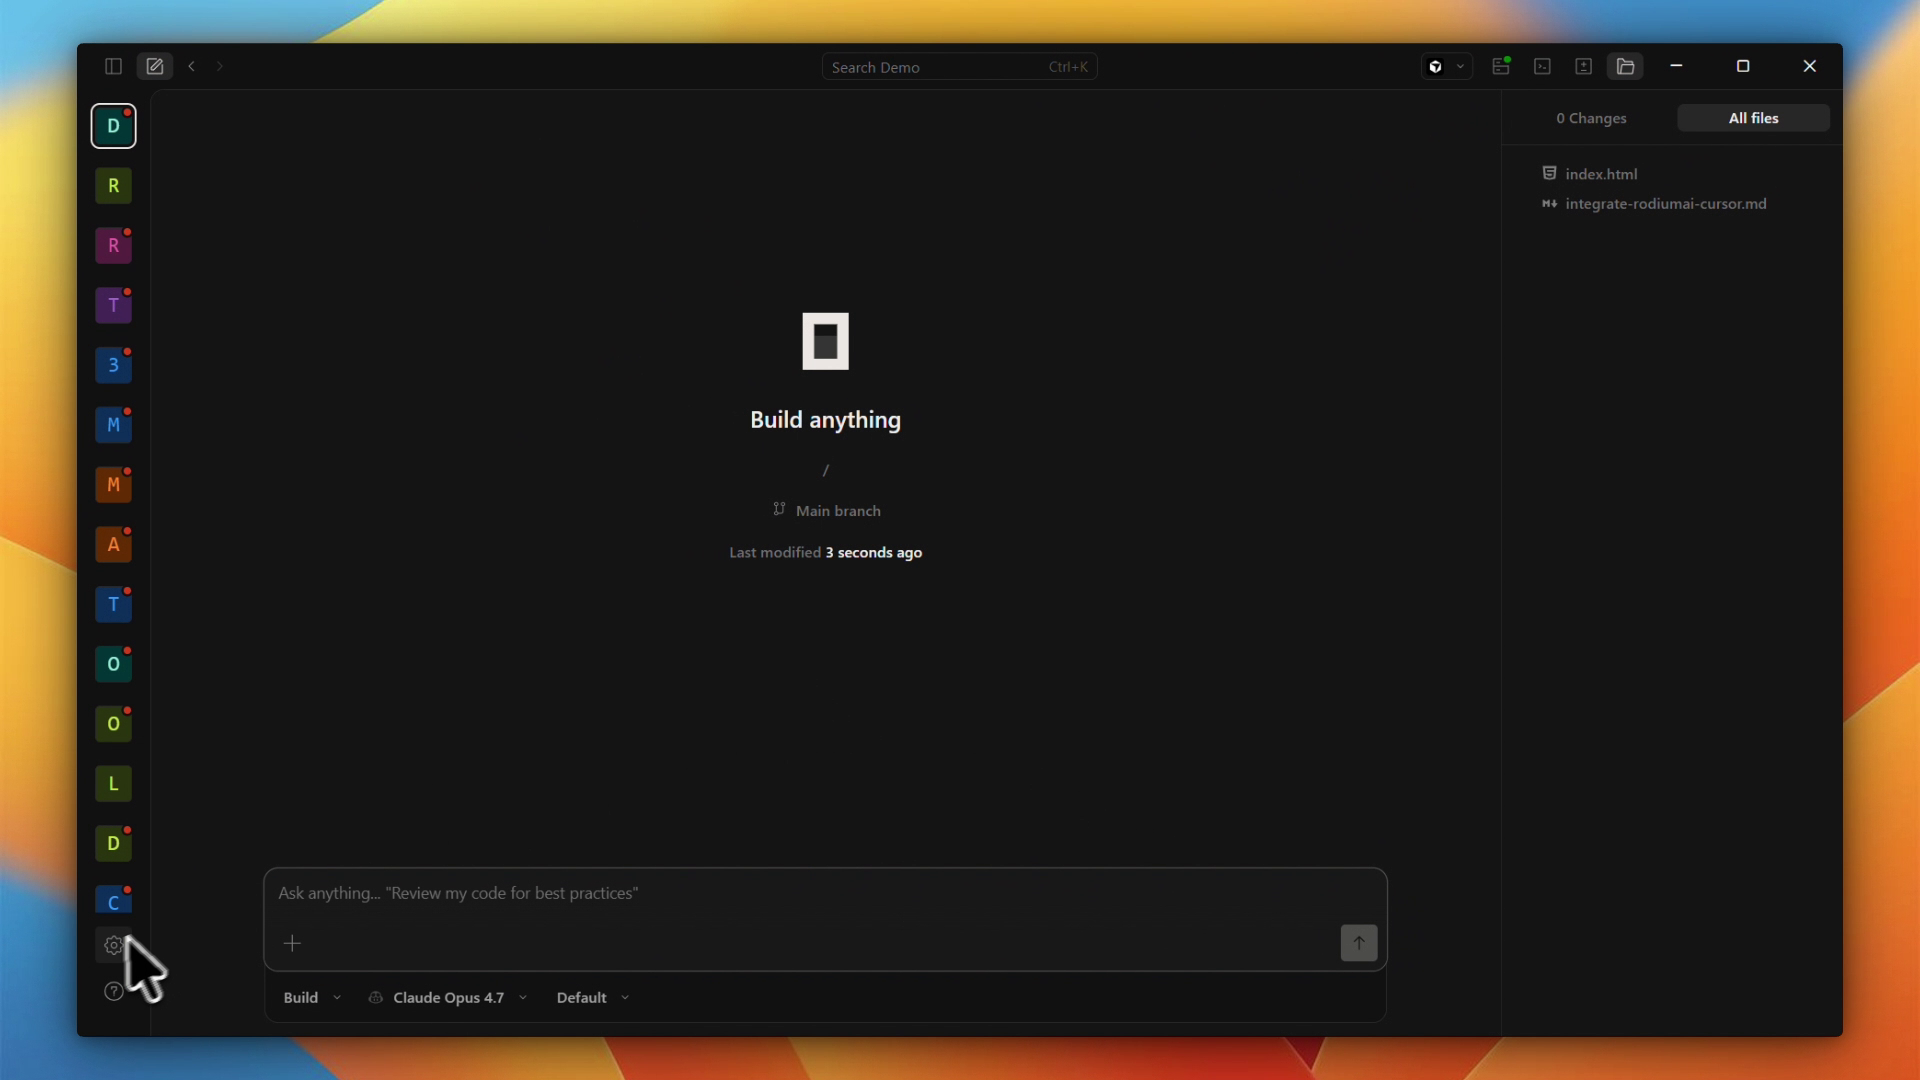
Why OpenCode + RodiumAI?
OpenCode is an AI-powered coding agent available as a desktop app. It supports any OpenAI-compatible provider through its custom provider feature — which means you can connect RodiumAI directly from the settings UI, no config file needed.
With RodiumAI you get:
One API key for GPT, Claude, Gemini, DeepSeek, Mistral, and more.
RODI credits rechargeable via Mobile Money (Orange, MTN, Wave…) or bank transfer.
Smart routing profiles (
auto,pro,fast) that balance cost and performance automatically.Full usage visibility in your RodiumAI dashboard.
Prerequisites
Before starting, make sure you have:
A RodiumAI account — sign up at rodiumai.io.
At least one API key created in your dashboard (Dashboard → API Keys).
A positive RODI credit balance (Dashboard → Billing → Top up).
OpenCode Desktop installed — download at opencode.ai.
Note: Your RodiumAI API key starts with
rd_sk_prod_for production keys. It is only shown once at creation — if you lose it, use the Regenerate button in the dashboard.
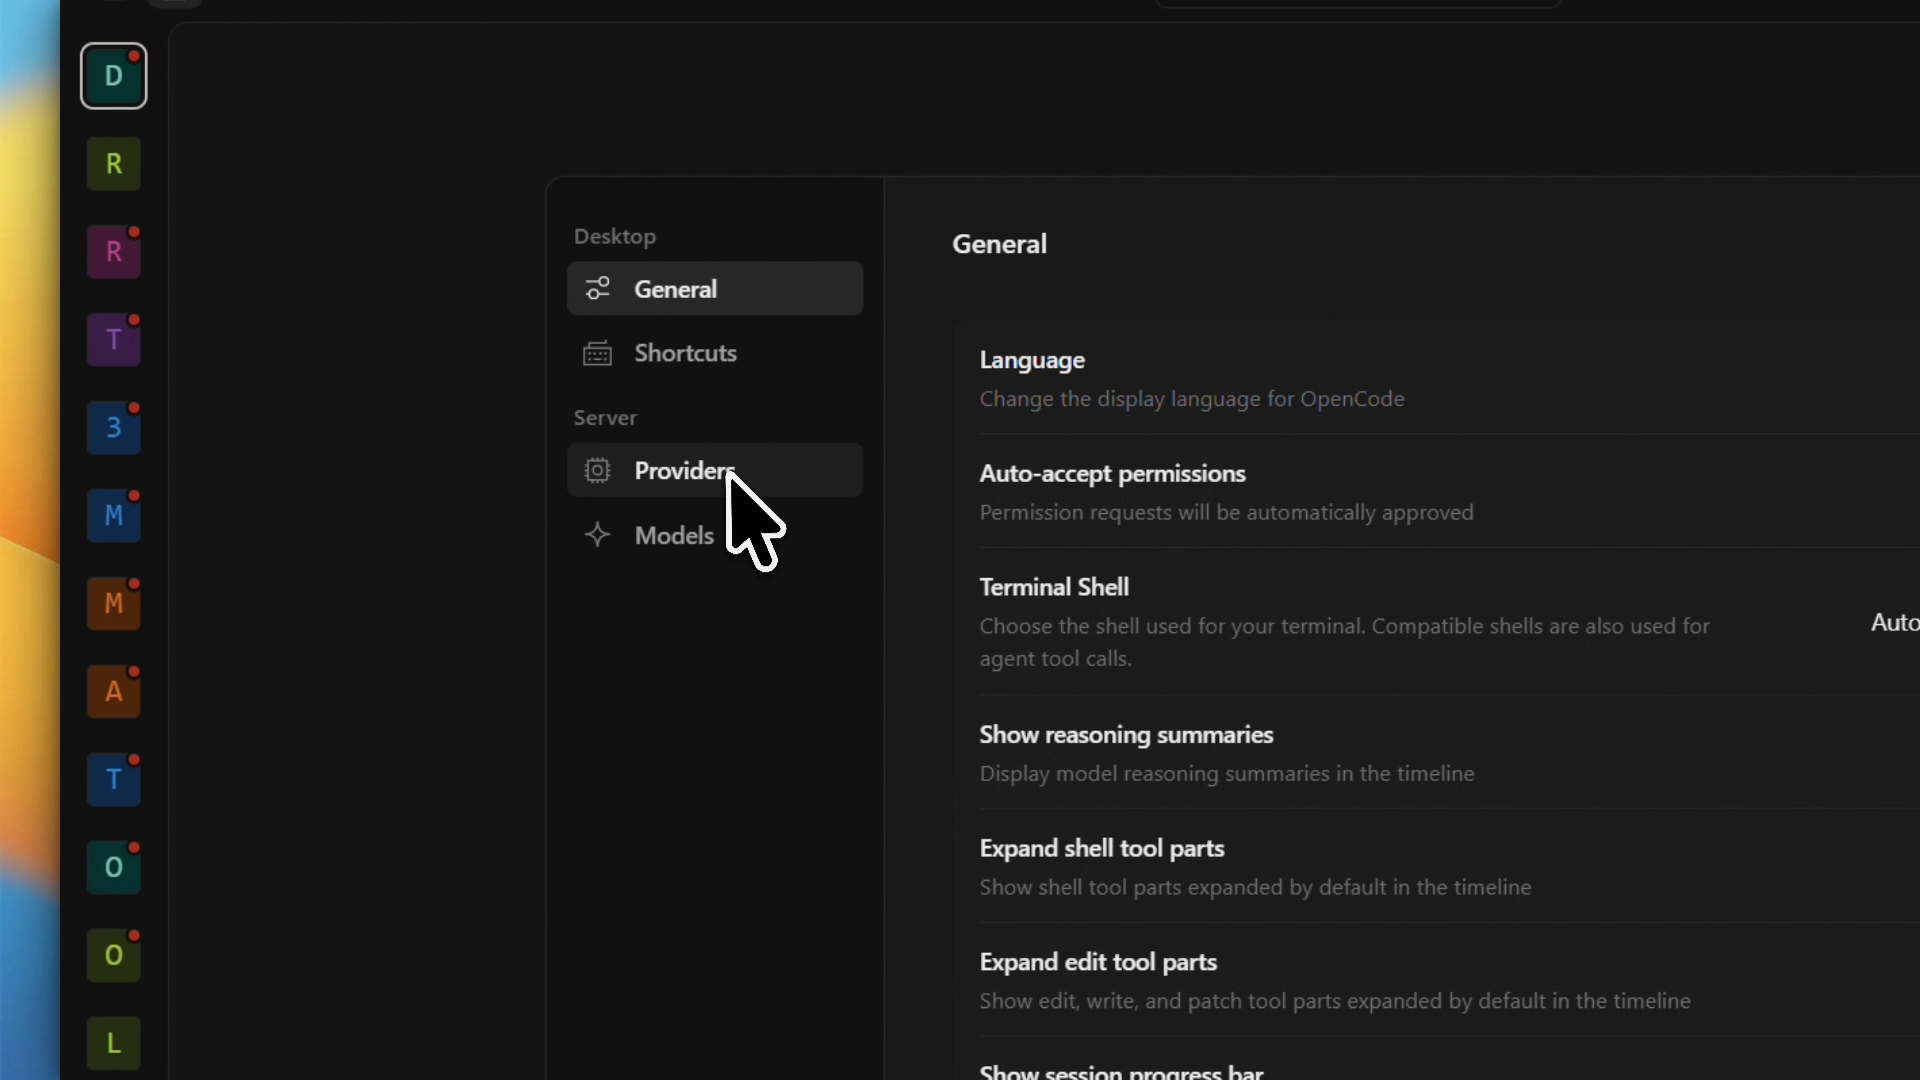
Step 1 — Open Settings → Providers
Launch OpenCode Desktop. Click the ⚙️ Settings icon at the bottom left of the sidebar.
In the Settings panel, click Providers under the Server section.
Step 2 — Add a Custom provider
On the Providers page, you will see a list of popular providers. Scroll to the bottom and click + Connect next to Custom provider.
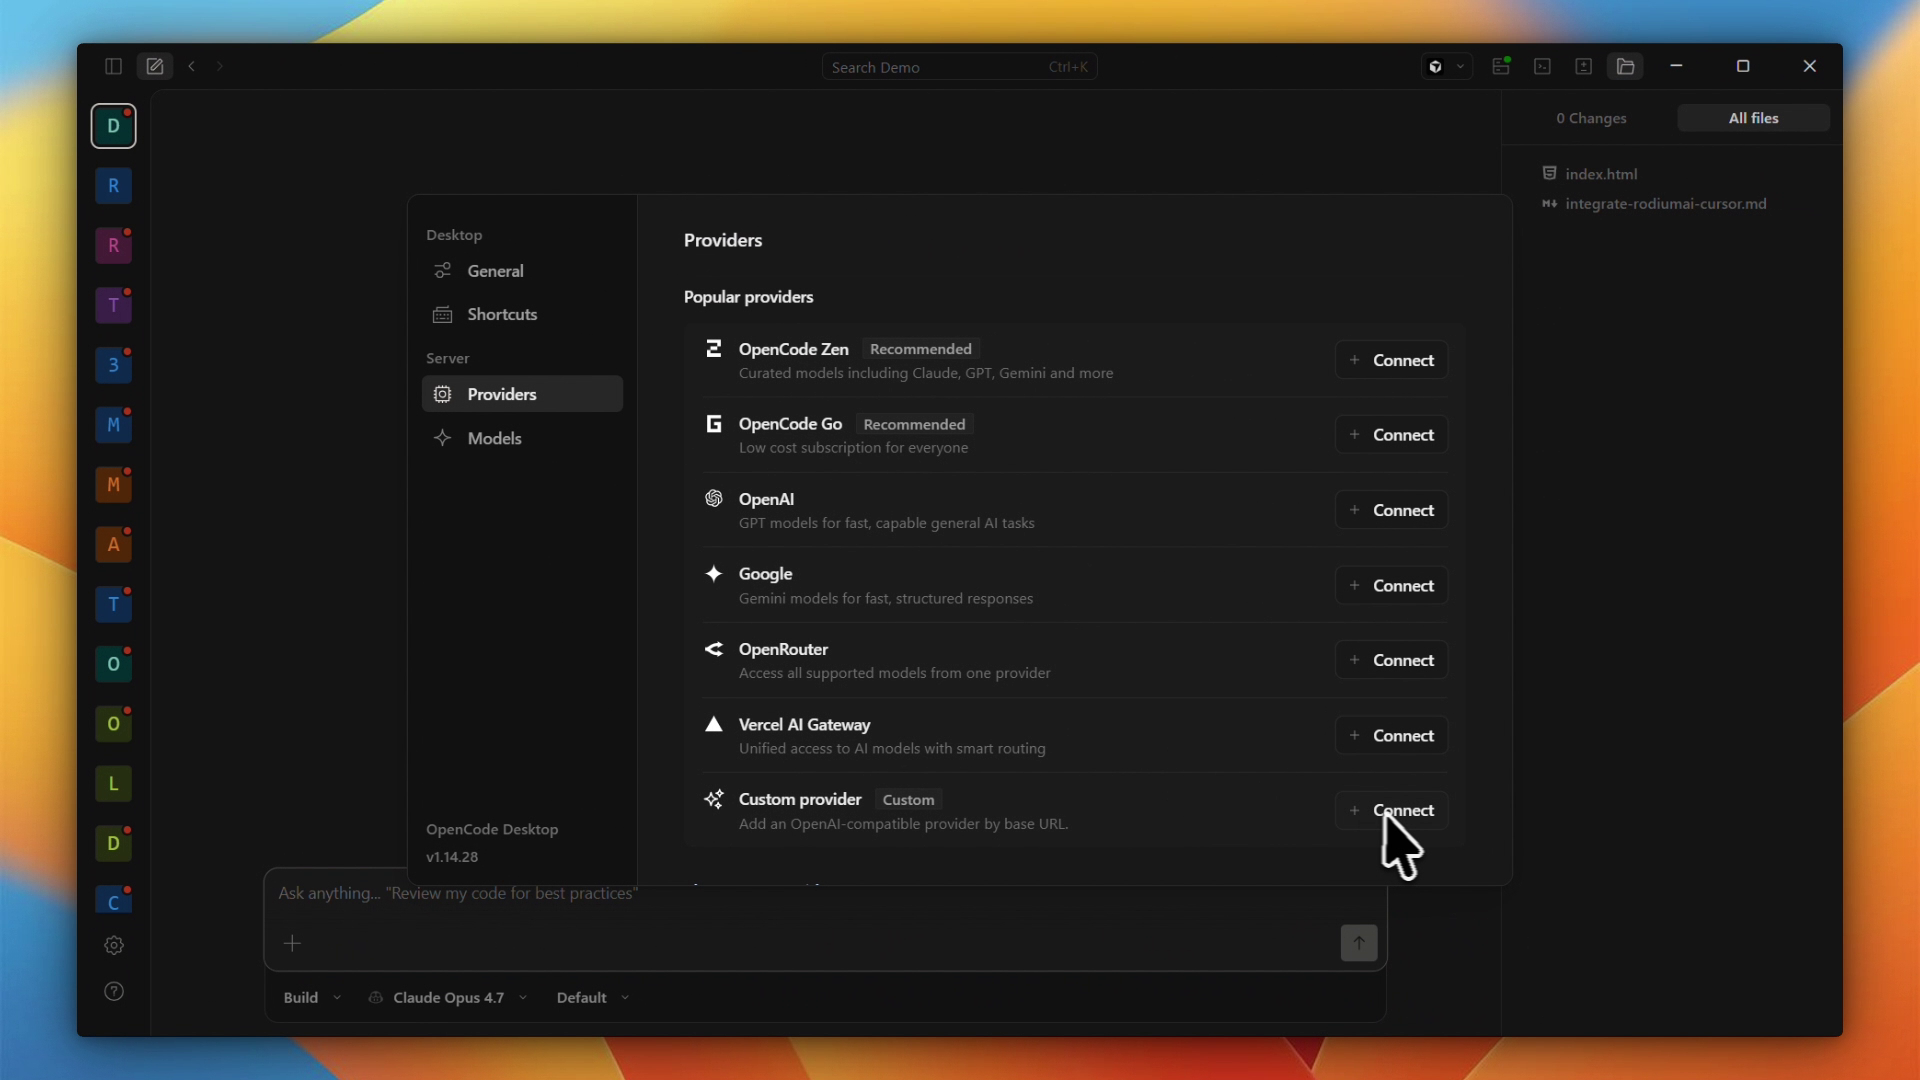
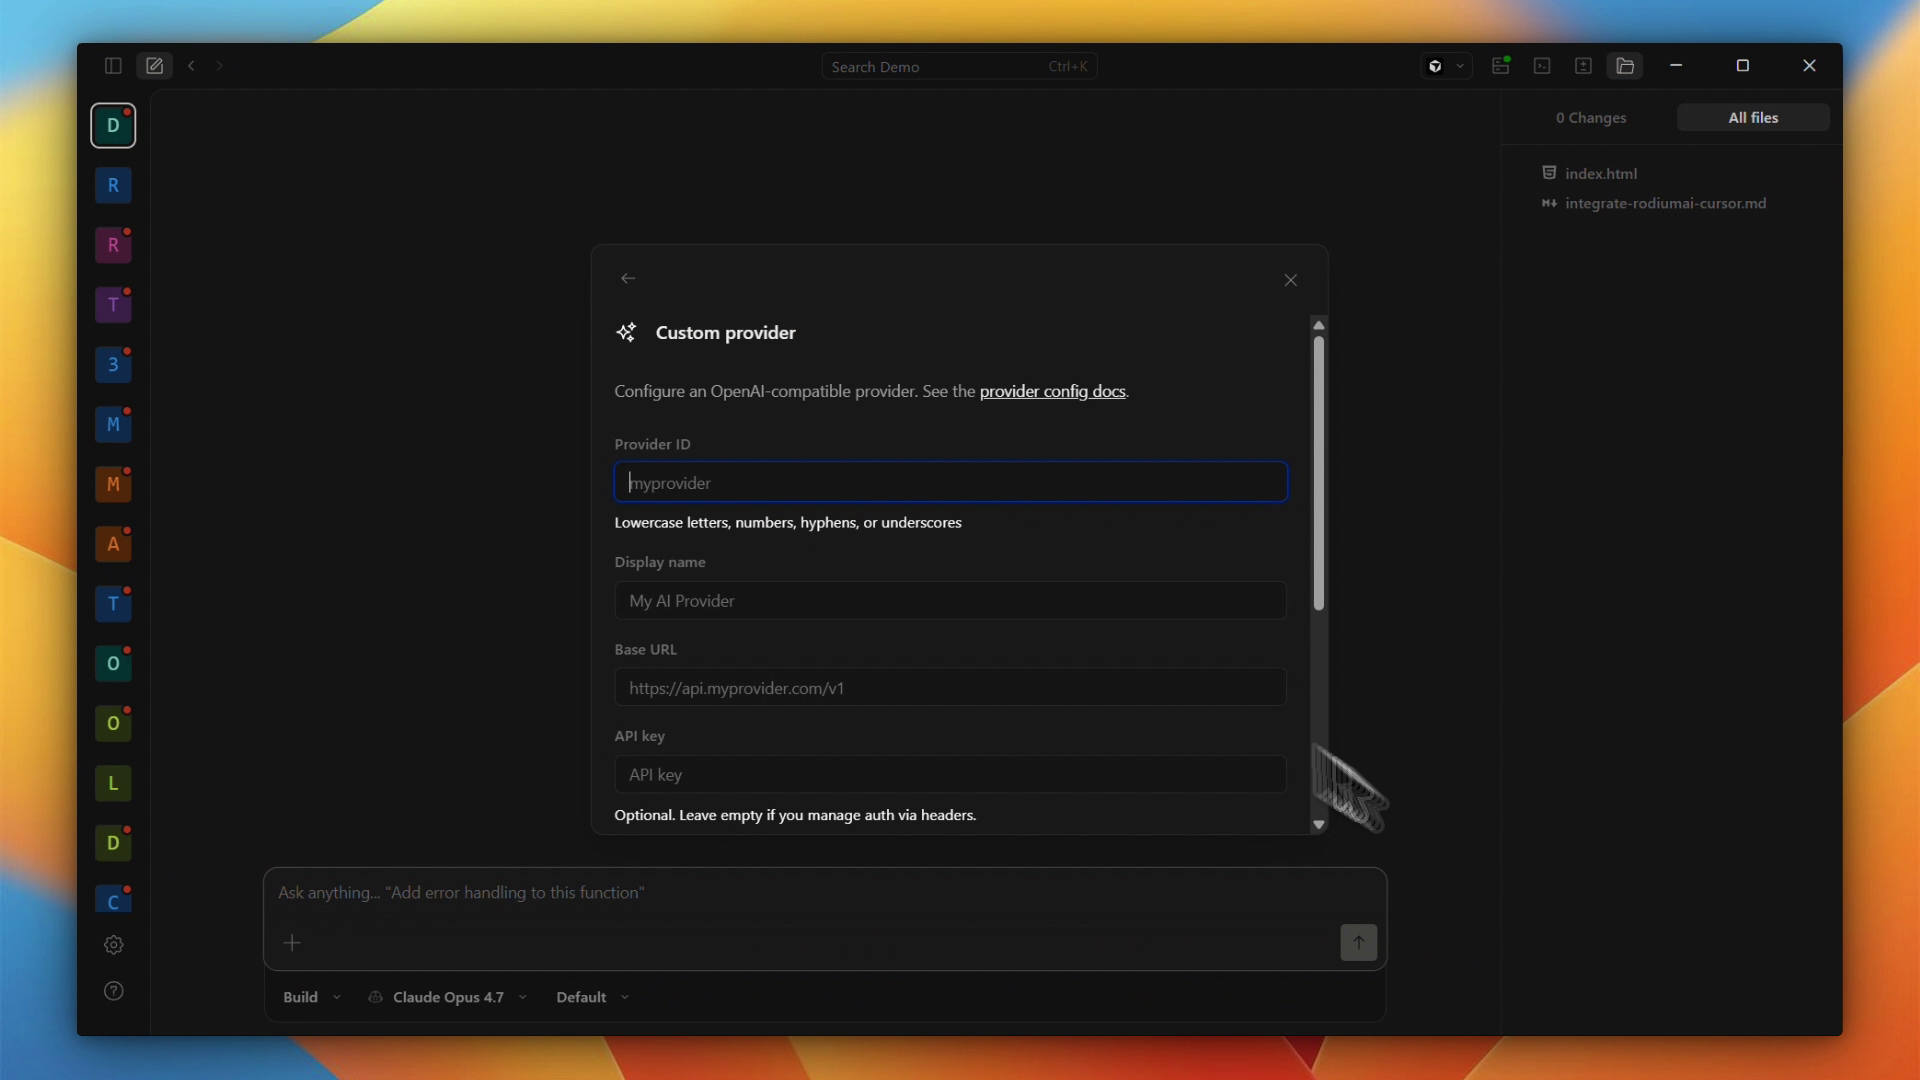
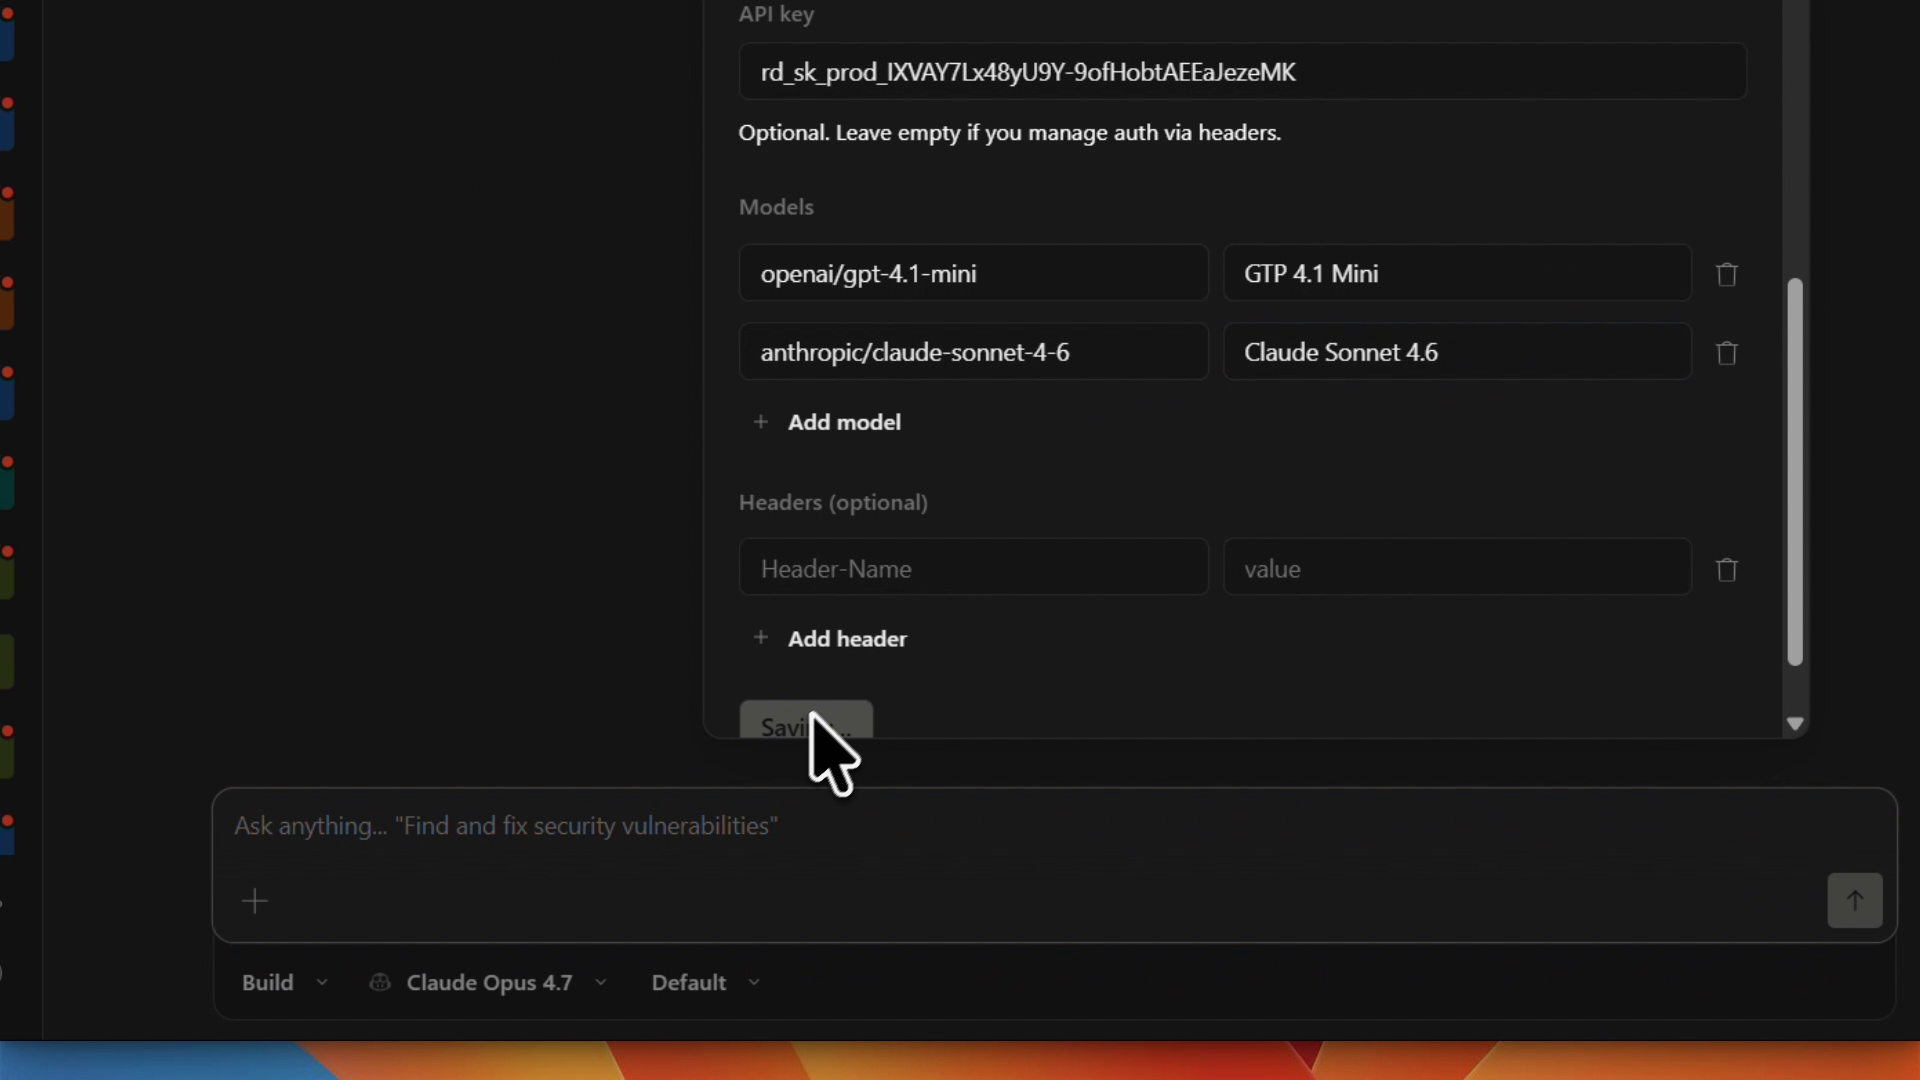
A form opens asking for:
Provider ID — a unique identifier for this provider (e.g.
rodiumai)Display name — the label shown in the model selector (e.g.
RodiumAI)Base URL — the RodiumAI API endpoint
API key — your RodiumAI key
Step 3 — Fill in the RodiumAI connection details
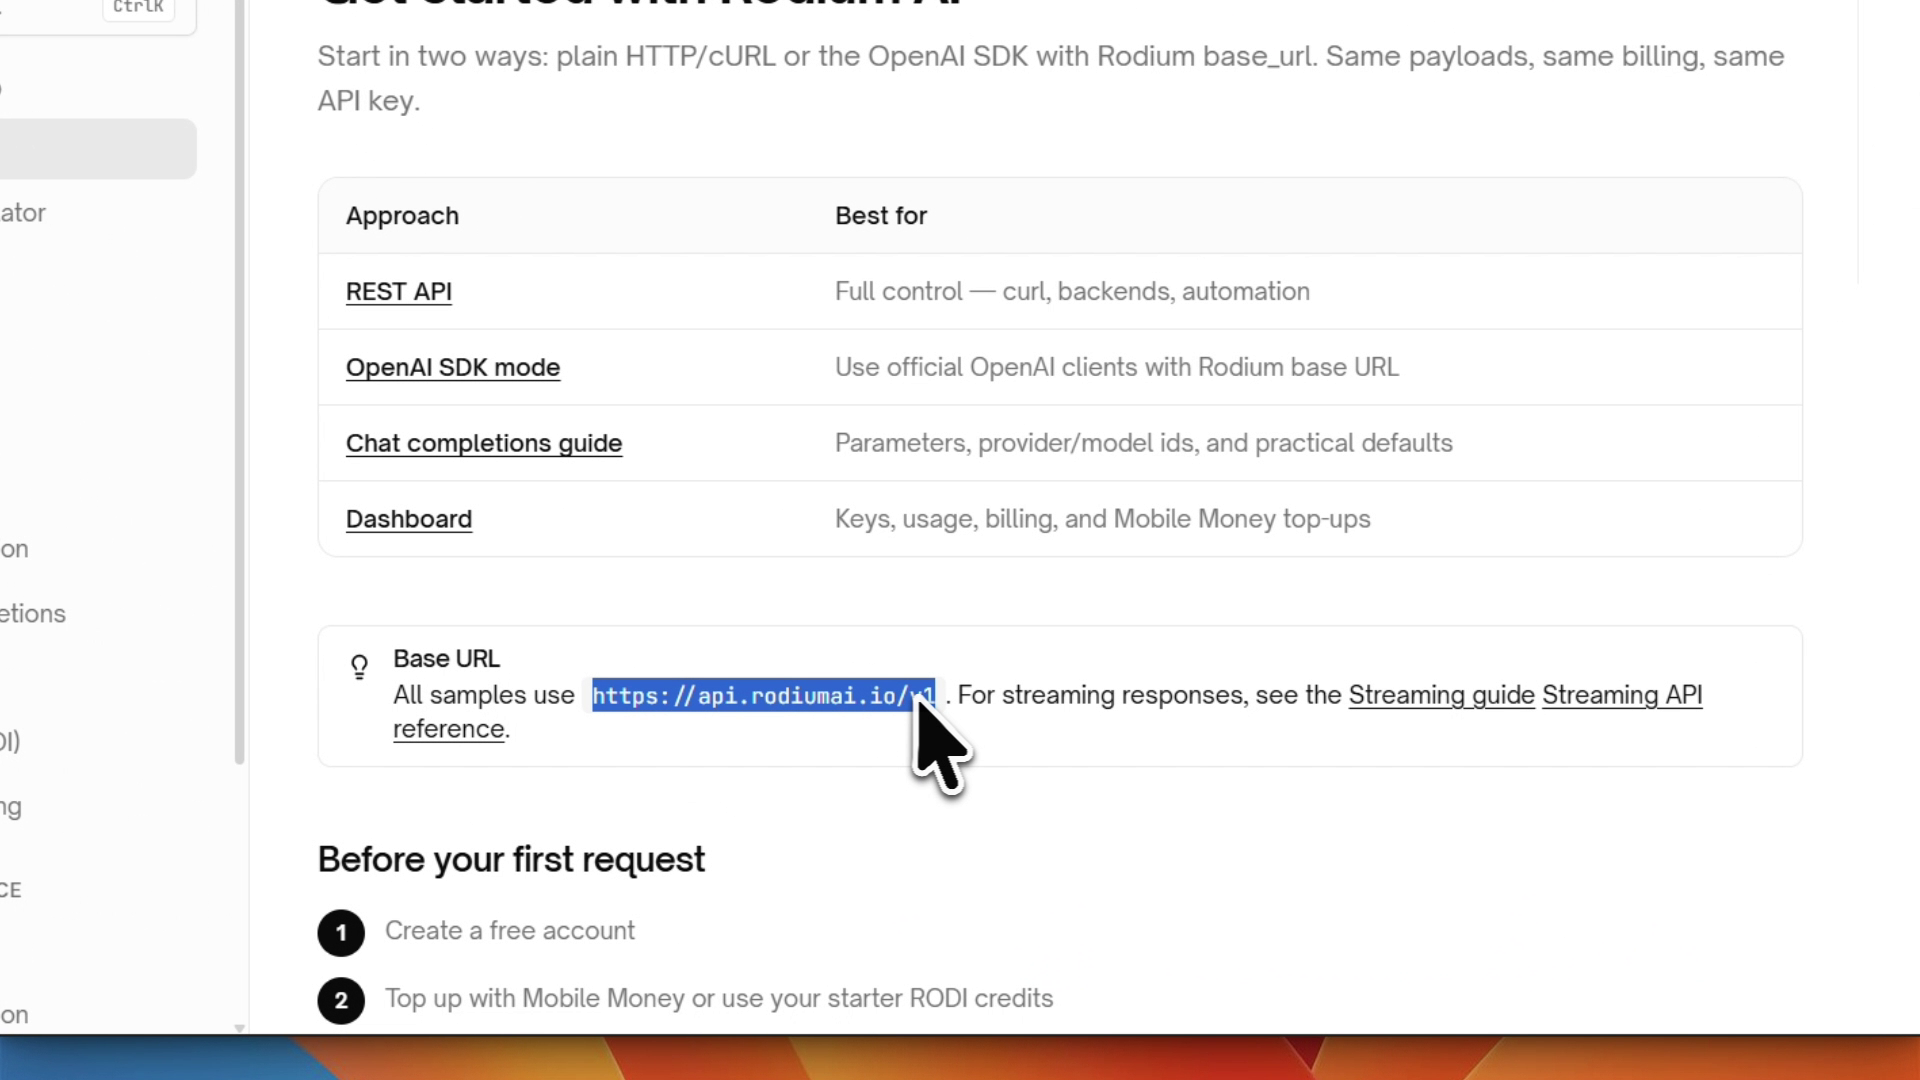
Get the Base URL
Go to rodiumai.io/docs and look for the Base URL section. All API samples use:
https://api.rodiumai.io/v1
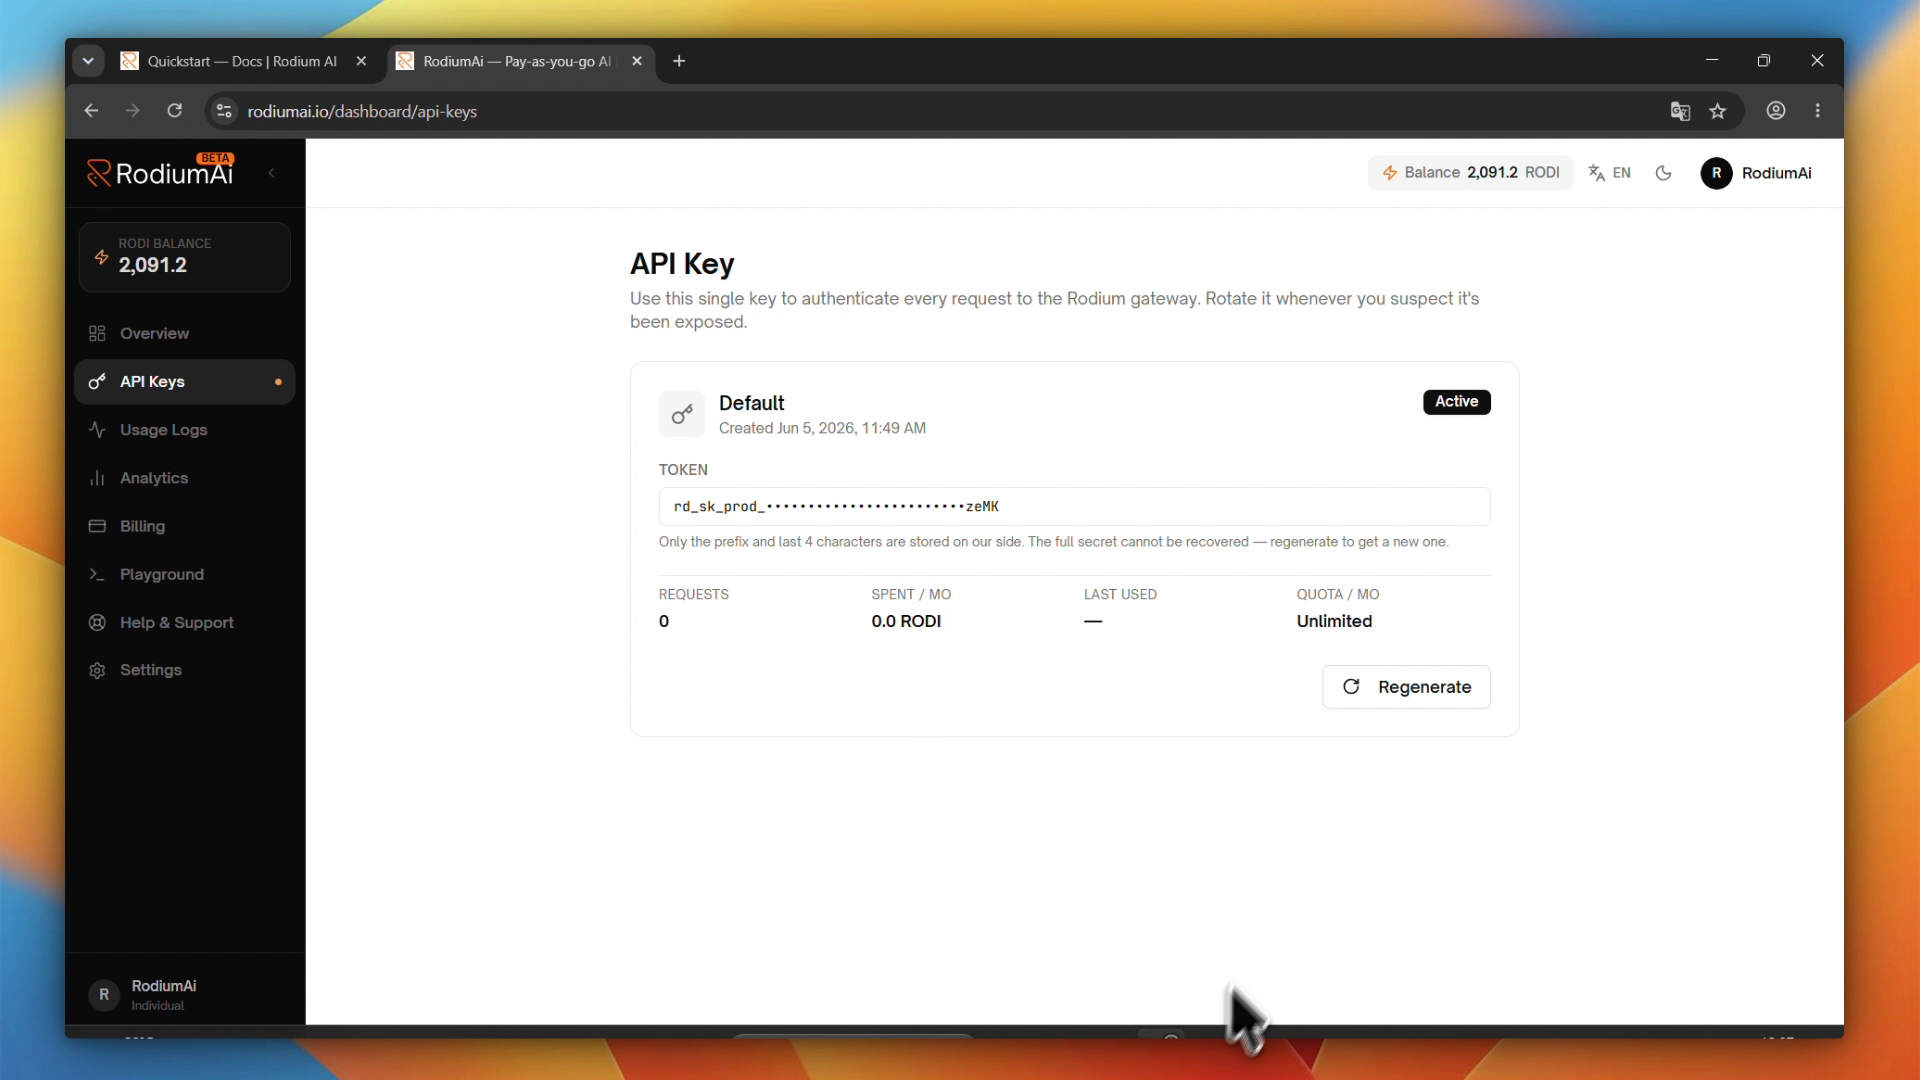
Get your API key
Go to rodiumai.io/dashboard/api-keys. Your key is displayed in the format:
rd_sk_prod_u••••••••••••••••••••••••zeMK
Important: The full secret is only shown once at creation. Only the prefix and last 4 characters are stored on the RodiumAI side. If you no longer have the full key, click Regenerate to create a new one.
Fill in the form
Enter the details in the OpenCode Custom provider form:
FieldValueProvider IDrodiumaiDisplay nameRodiumAIBase URLhttps://api.rodiumai.io/v1API keyrd_sk_prod_uxxxxxxxxxxxxxxxxxxxxxxxx
Step 4 — Add your models
Still in the same form, scroll down to the Models section. Here you add each model you want to use from RodiumAI.
For each model, fill in two fields:
Model ID — the exact slug from the RodiumAI catalog
Display Name — the label shown in the UI (your choice)
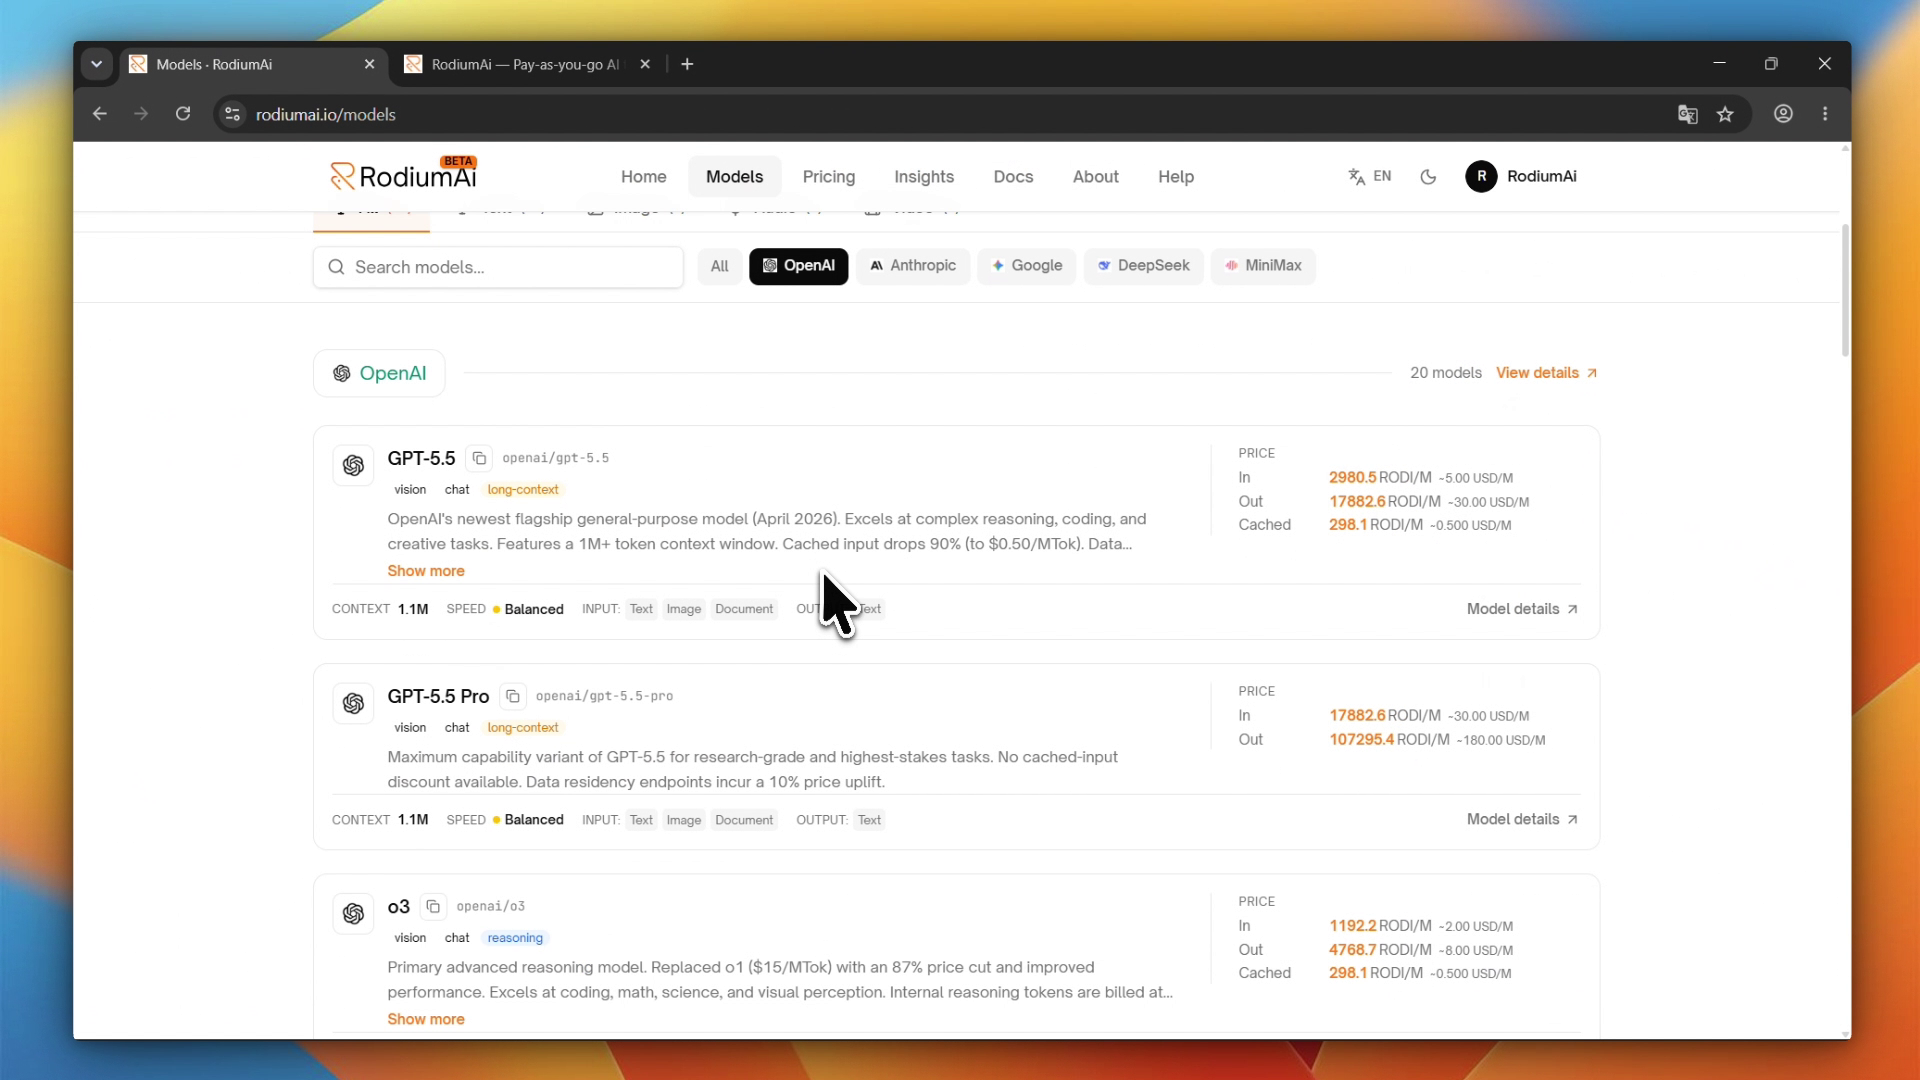
Find model slugs
Go to rodiumai.io/models to browse the full catalog. Each model card shows its exact slug — for example:
openai/gpt-5.5openai/gpt-5.5-proanthropic/claude-sonnet-4-6google/gemini-2.5-flashdeepseek/deepseek-chat
Copy the slug exactly as shown and paste it into the Model ID field. Then type the display name you want to see in the model picker.
Click + Add model to add more models.
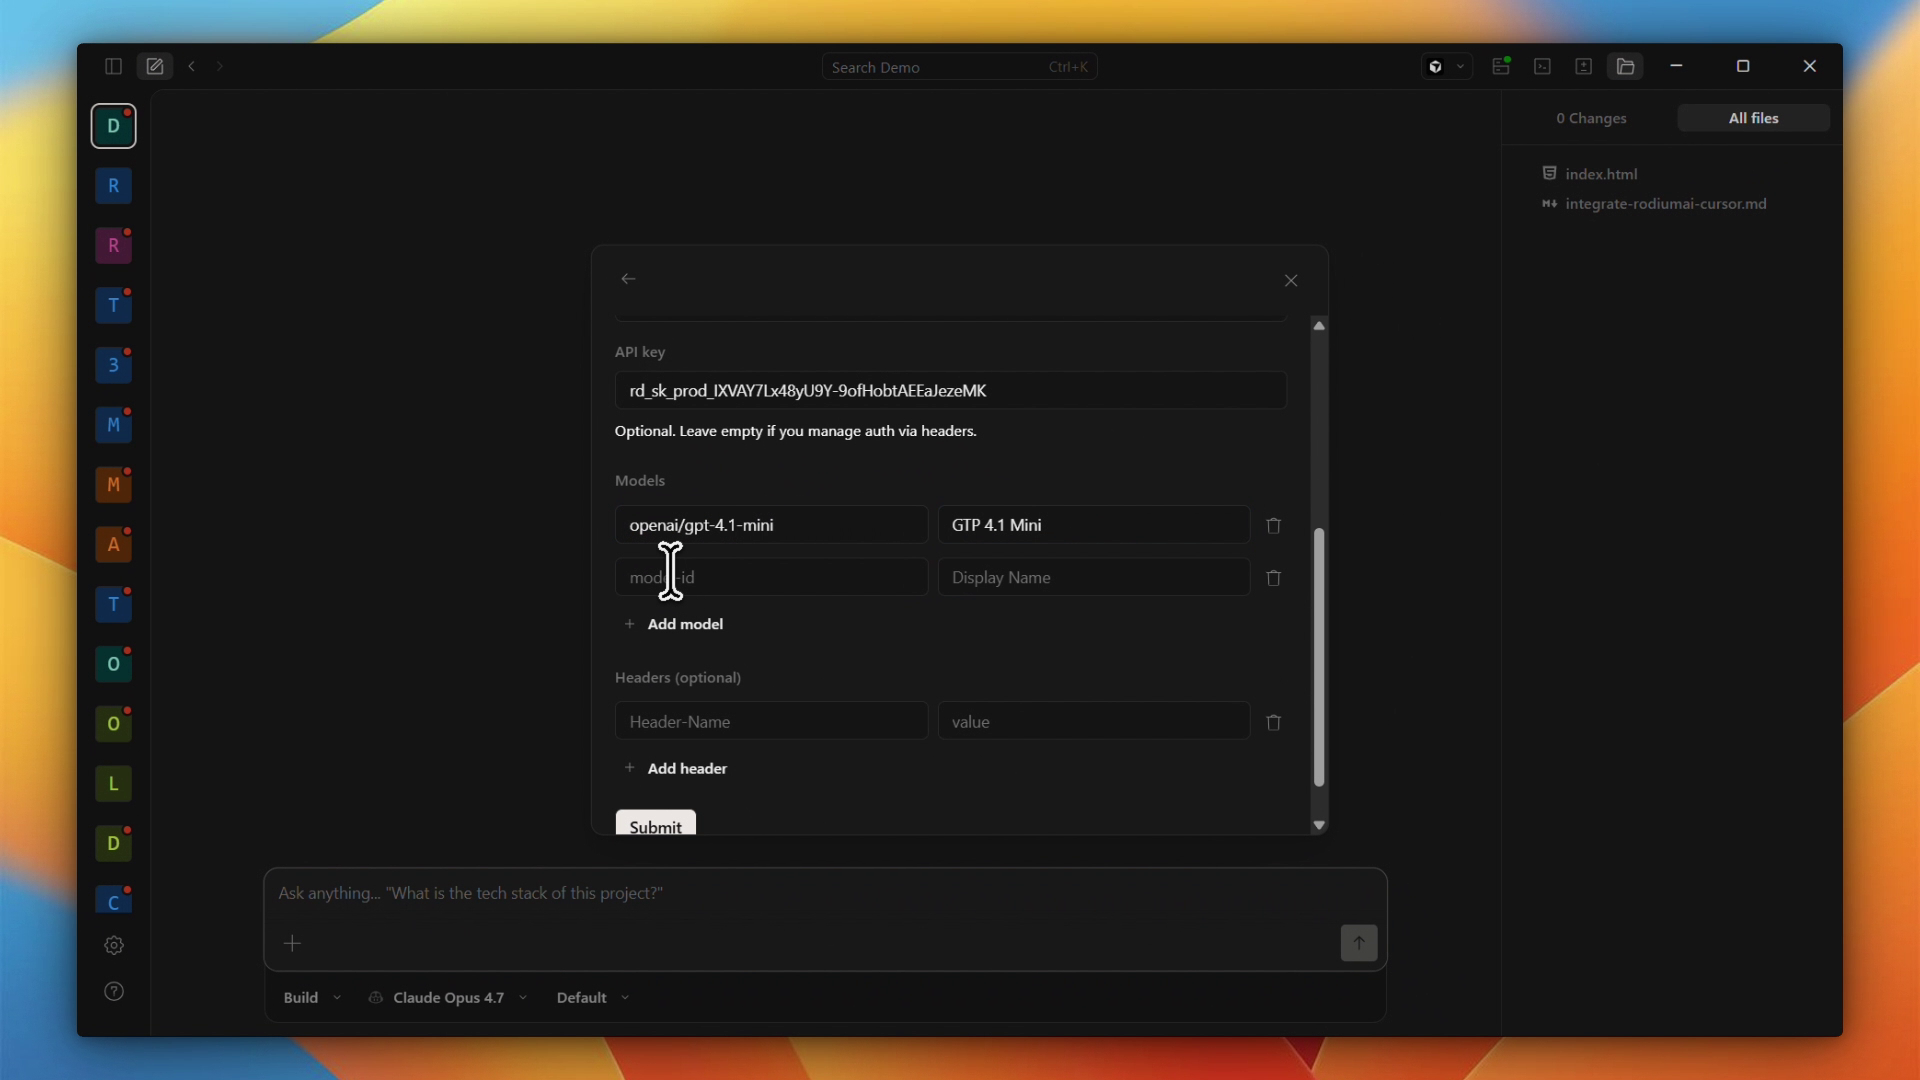
Example configuration
Model IDDisplay Nameopenai/gpt-4.1-miniGTP 4.1 Minianthropic/claude-sonnet-4-6Claude Sonnet 4.6openai/gpt-5.5GPT 5.5
Step 5 — Save and restart OpenCode
Once all fields are filled, scroll down and click Save (or Submit depending on your version).
Then close and reopen OpenCode Desktop. This is required for the new provider and its models to appear in the model selector.
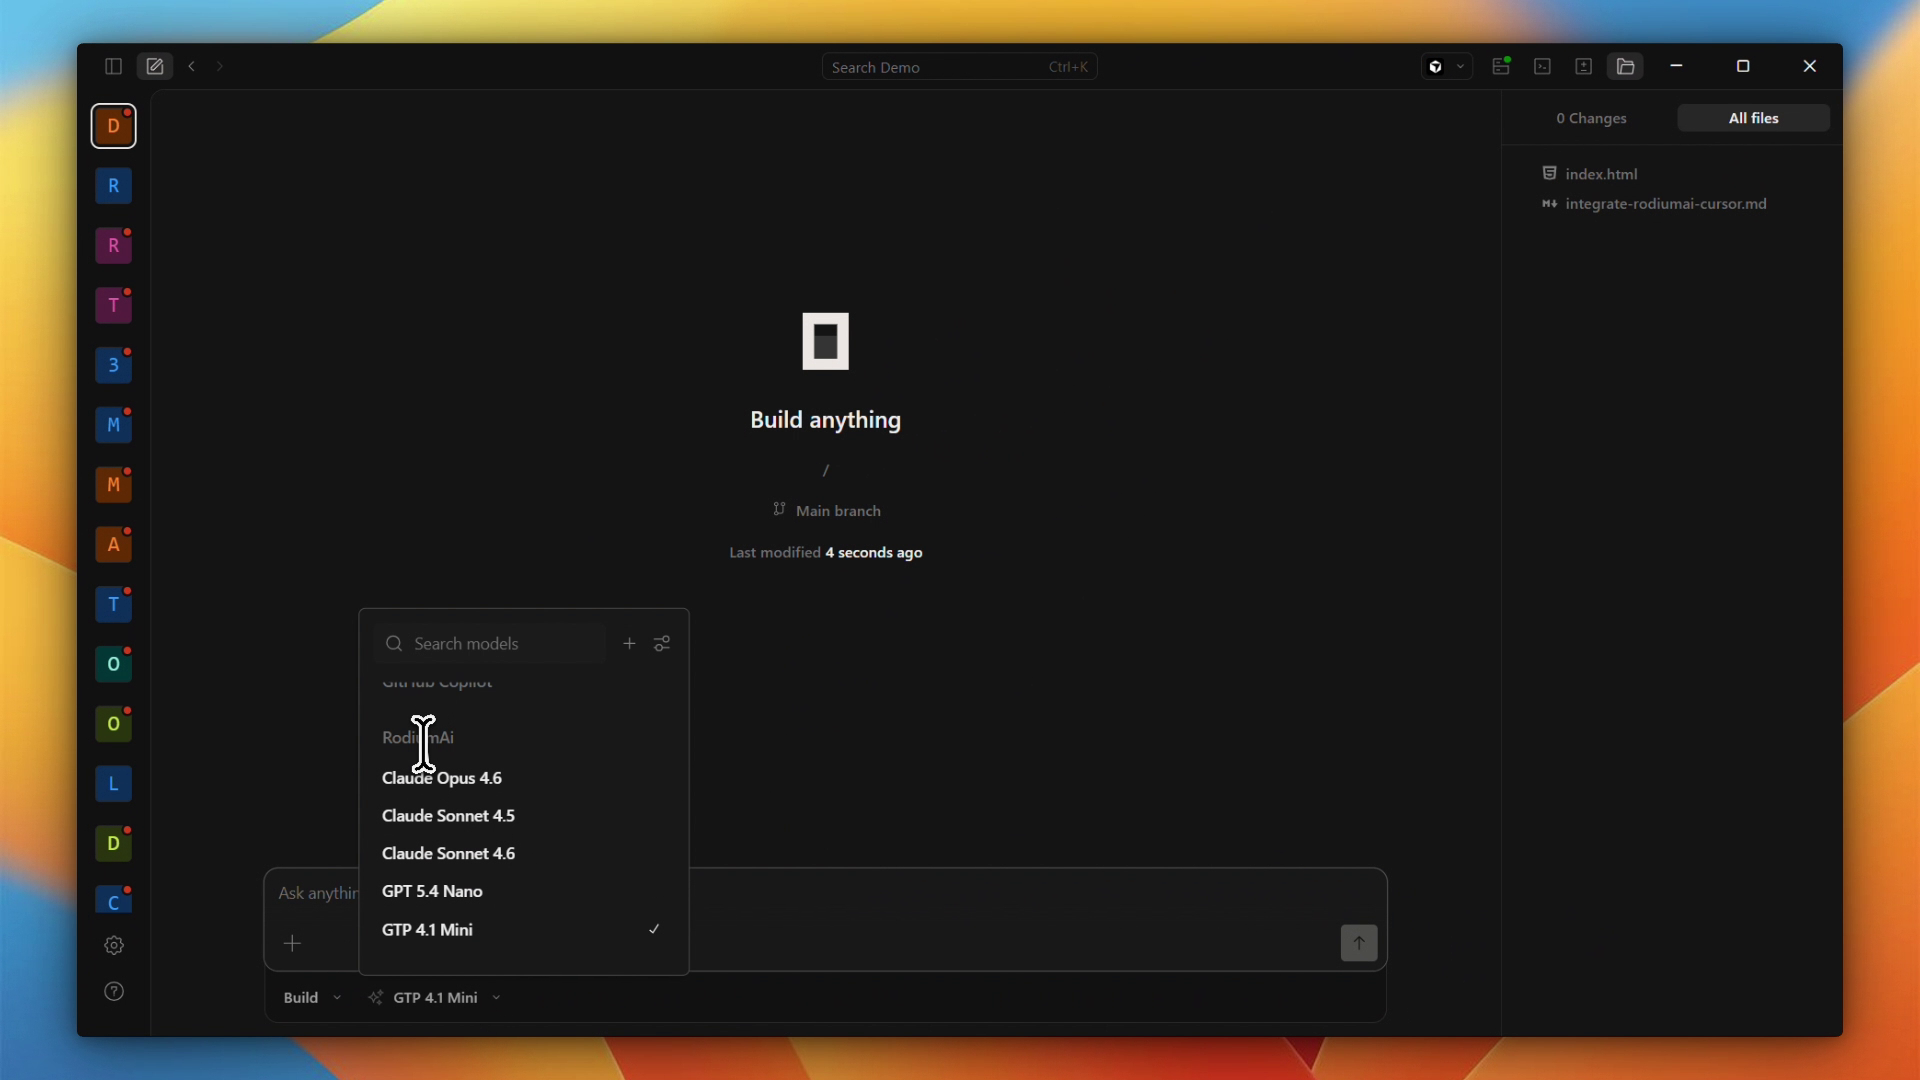
Step 6 — Select a RodiumAI model and start coding
Click the model selector at the bottom of the chat panel (next to Build). You will now see RodiumAi as a provider section in the list, with all the models you added.
Select the model you want and start sending requests. Your RODI credits are consumed per request and tracked in your dashboard.
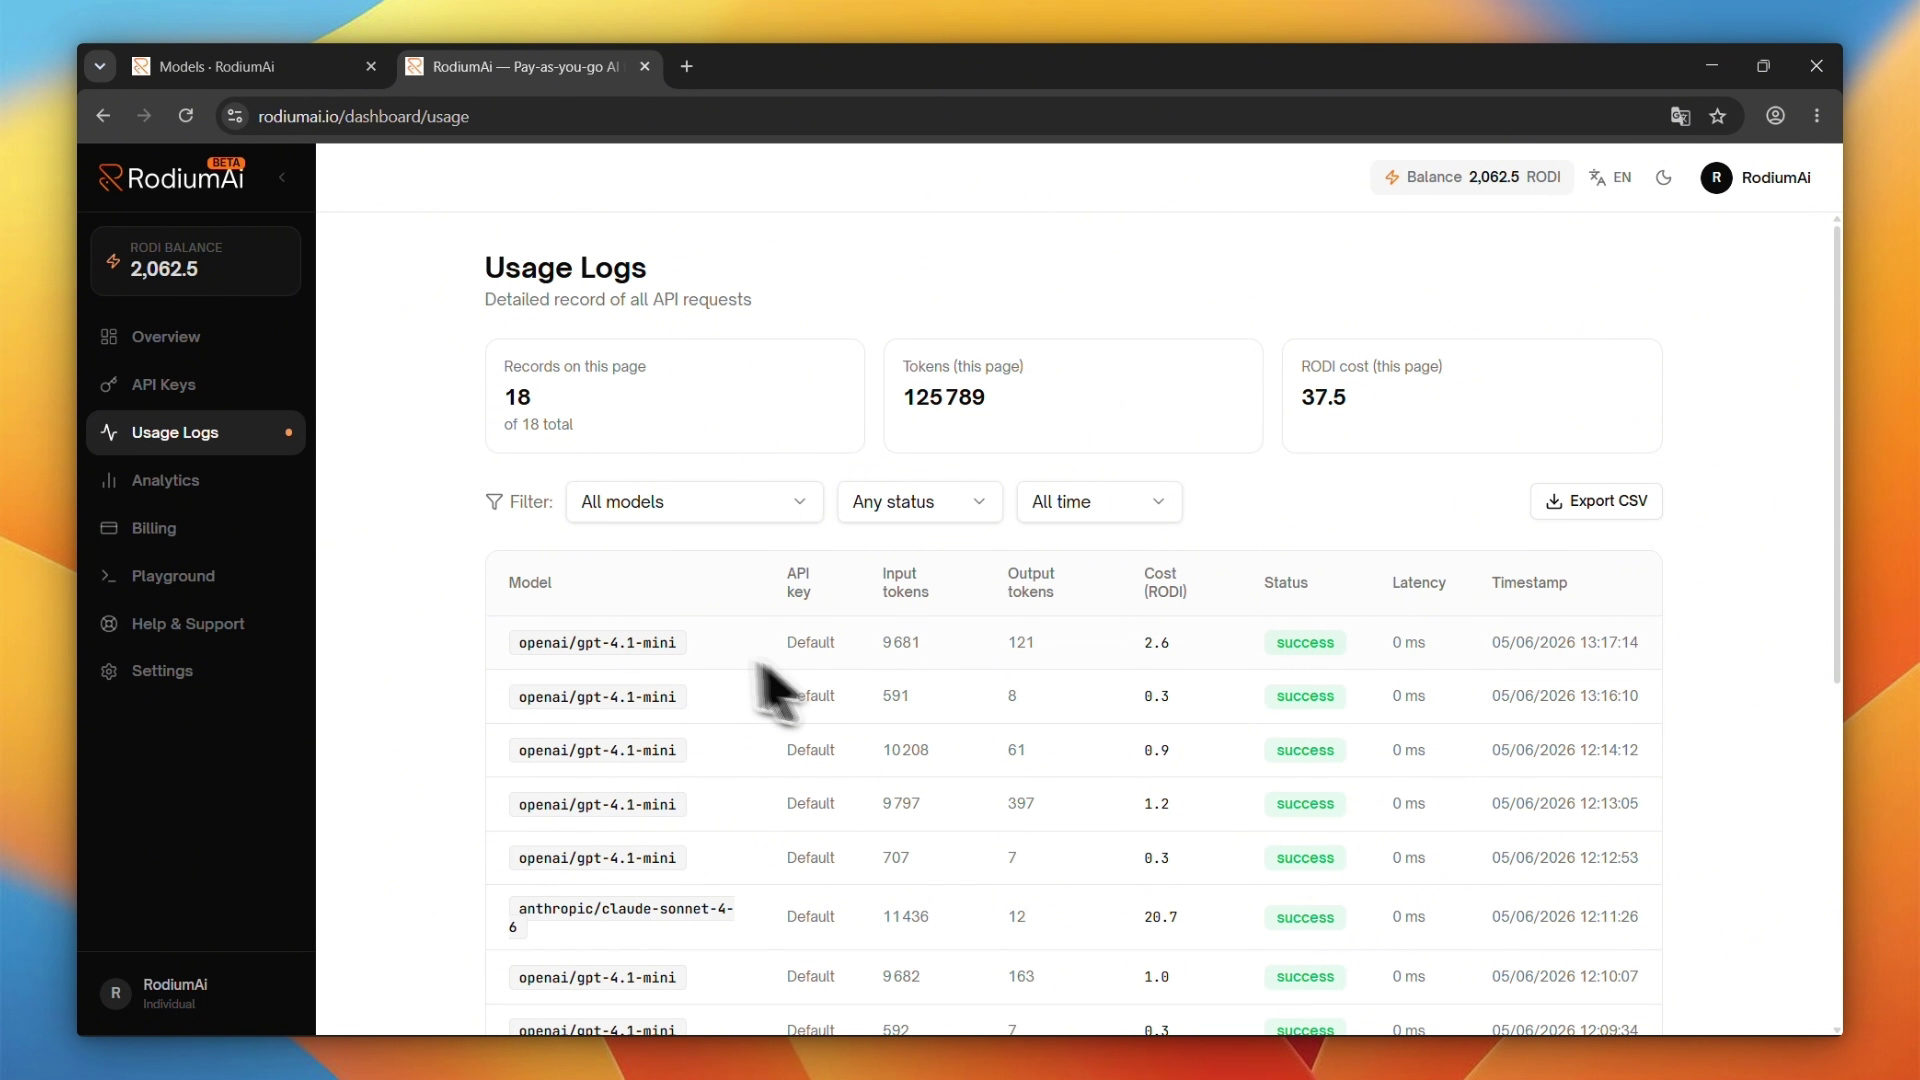
Monitor your usage
Every request made by OpenCode consumes RODI credits. Track your spending in real time:
Go to rodiumai.io → Dashboard → Usage Logs
Filter by date range, model, or API key
Set up a low balance alert under Billing settings to avoid interruptions
Troubleshooting
SymptomCauseFix401 UnauthorizedInvalid or missing API keyRegenerate the key in Dashboard → API Keys402 Payment RequiredInsufficient RODI balanceTop up credits in Dashboard → BillingModel not appearing in selectorOpenCode not restarted after saveClose and reopen OpenCode DesktopUnknown model errorWrong model slugCopy the slug exactly from rodiumai.io/modelsNo response / timeoutNetwork or proxy issueCheck internet connection; disable local proxy if any
Next steps
Recharge your wallet with Mobile Money directly from the dashboard → rodiumai.io/billing.
Create separate API keys per project for granular usage tracking (Dashboard → API Keys → New Key).
Explore other integrations: Cursor, Cline, n8n, Continue.dev — check the Insights section.
Join the community: share your setup on X or LinkedIn and tag @RodiumAI.